
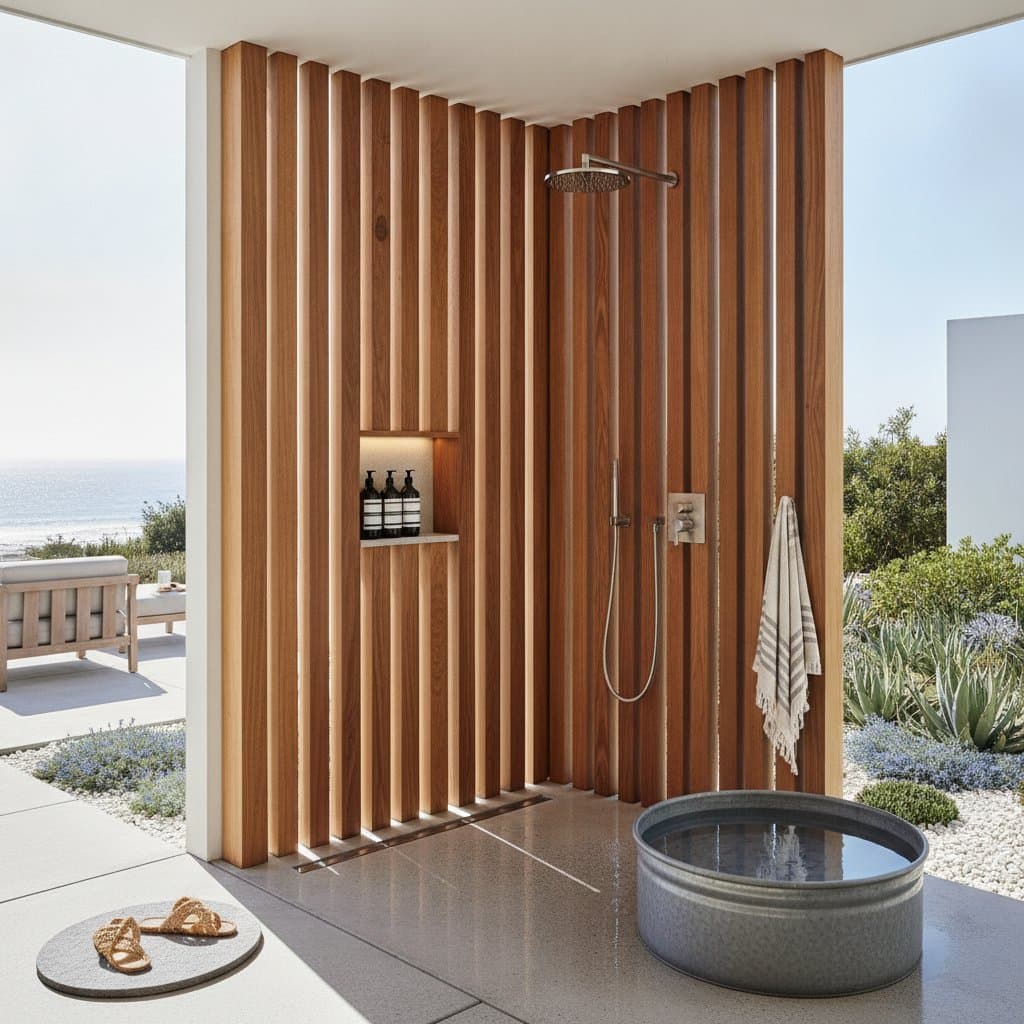
7 Coastal Outdoor Shower Ideas for an $8K Remodel ROI
A coastal outdoor shower transforms a San Diego backyard into a cleaner, more comfortable space that connects directly to beach living. Sand, salt, sunscreen, and wet towels stay outside instead of tracking through the house. Thoughtful planning turns this feature into a polished element that supports both entertaining and daily routines.
An $8,000 investment covers a well-designed remodel with durable finishes, quality plumbing, privacy features, and practical accessories. The return depends on workmanship, location, design quality, and how naturally the shower integrates with the property. Buyers respond best to improvements that appear intentional and require minimal upkeep.
The following ideas explain where to allocate spending, which materials withstand ocean conditions, and how to protect your remodel investment.
Planning Your Coastal Outdoor Shower
Choose a Location That Supports Daily Use
The strongest location sits near a pool, patio, beach gear storage area, or side entry. A short route from the shower to the home controls water and sand without creating muddy paths across the yard.
Look for a spot with existing access to hot and cold water, a practical drainage route, enough room for privacy panels, protection from strong wind, and a stable surface that remains safe when wet. Placing the shower near existing plumbing reduces labor costs. Longer water runs, difficult trenching, or complicated drainage can consume a large portion of an $8,000 budget.
Select Coastal-Ready Materials
Salt air affects metal, fasteners, lighting, and plumbing trim. Choose materials rated for wet outdoor environments, especially when the shower sits close to the shoreline.
Strong options include marine-grade stainless steel fixtures, powder-coated aluminum privacy panels, porcelain tile with textured surfaces, teak or composite shower flooring, and concrete or sealed natural stone. Avoid untreated steel and porous materials that stain easily. Every fastener should resist corrosion, and exposed wood requires regular care.
Request product specifications from installers instead of relying on appearance alone. A beautiful fixture can deteriorate quickly if it is not suited to coastal conditions.
Plan Drainage Before Choosing Finishes
Drainage affects comfort, sanitation, and permitting requirements. Water should move away from the home, neighboring property, and foundation without pooling around the shower base.
A professional may recommend a linear drain, gravel drainage area, dry well, or connection to an approved system. The right choice depends on soil, slope, local rules, and the amount of water the shower will receive. Do not allow runoff to flow toward a walkway. Standing water creates slippery surfaces and may encourage mildew or insects.
Luxury Outdoor Features That Add Value
Add Hot and Cold Water Controls
A cold rinse works well for removing sand, but hot water makes the shower useful throughout the year. A pressure-balanced valve helps maintain a comfortable temperature when another fixture operates inside the home.
Consider a handheld sprayer alongside a fixed showerhead. The handheld option makes it easier to rinse feet, pets, beach equipment, and children. A thermostatic valve can provide more precise temperature control, though it may increase the fixture budget. Spend first on reliable valves and corrosion-resistant trim, then add specialty features if the budget allows.
Build Privacy Into the Design
Privacy determines whether an outdoor shower feels luxurious or exposed. Full-height walls provide the most coverage, while slatted screens allow airflow and filtered light.
Popular coastal privacy treatments include horizontal wood slats, smooth stucco walls, frosted glass panels, decorative concrete block, and tall, noninvasive screening plants. Make sure the enclosure is wide enough to move comfortably and open enough for ventilation. Dense plants can create a beautiful setting, but they should not trap moisture against the shower structure.
Include a Comfortable Drying Zone
A small landing area makes a major difference. Add hooks for towels, a bench for changing, and a shelf for soap or sunscreen. These details help the shower function as a complete outdoor room instead of a simple rinse station.
Use accessories designed for marine or poolside conditions. Teak, composite lumber, stainless steel, and sealed masonry perform better than untreated materials. A built-in bench may cost more than a freestanding seat, but it creates a cleaner appearance and can double as storage when designed with a lift-up top.
Use Lighting for Safety and Atmosphere
Lighting should support safe movement without creating glare for nearby homes. Place a damp-rated fixture near the entrance, then use low-voltage landscape lighting to illuminate the path and surrounding plants.
Avoid placing electrical components where spray can reach them. An electrician should confirm suitable ratings, wiring protection, and switch placement. Warm, soft lighting can make the shower feel like part of a resort-style backyard. Keep the design restrained, since excessive brightness can reduce privacy and disturb neighbors.
Managing an $8K Remodel Budget
Divide Spending by Function
A practical budget should prioritize plumbing, drainage, waterproofing, and durable finishes. Cosmetic details matter, but they cannot compensate for leaks or poor grading.
A typical allocation may include plumbing and labor around $2,500 to $4,000, drainage and surface preparation around $800 to $1,800, fixtures around $600 to $1,500, privacy construction around $900 to $2,000, and accessories and lighting around $300 to $900. Actual pricing depends on access, materials, permits, and site conditions. Keep a reserve for unexpected trenching, repairs, or structural work.
Protect the Return on Investment
An outdoor shower rarely returns its cost through a simple one-to-one formula. Its value comes from improved usability, stronger outdoor living appeal, and a finished appearance that matches the home.
To protect your coastal remodel investment, match the shower to existing patio and landscape materials, use professional waterproofing, keep maintenance requirements reasonable, avoid highly personal finishes, and save invoices and product details for future buyers. A modest, well-built shower can support value more effectively than an elaborate installation with fragile finishes.
Add Features in the Right Order
If the budget feels tight, complete the essential systems first. A reliable valve, proper drainage, and a safe floor should come before decorative tile or specialty lighting.
Future upgrades can include a rain showerhead, a removable foot rinse, heated towel storage, a privacy gate, built-in shelving, and outdoor speakers placed away from spray. Planning conduit and structural support during the initial remodel can make later improvements easier and less expensive.
Maintenance and Long-Term Performance
Create a Simple Cleaning Routine
Rinse salt and sand from fixtures after heavy use. Wipe metal surfaces with fresh water, then dry them to reduce mineral buildup. Use mild soap on tile and avoid harsh cleaners that can damage sealants or finishes.
Inspect grout, caulk, drains, and fasteners regularly. Small gaps can allow water behind walls, where repairs become more expensive.
Care for Wood and Plants
Teak can weather naturally, but it still benefits from cleaning. If you want to preserve its original color, follow the manufacturer guidance for suitable oil or sealer.
Choose plants that tolerate coastal exposure and occasional splash. Keep roots away from plumbing and trim branches so leaves do not clog drains.
Review Local Requirements
Outdoor plumbing, drainage, electrical work, and privacy structures may require approvals. Requirements can differ by neighborhood and site conditions.
Ask a qualified contractor which portions need review before work begins. Confirm that the finished installation meets property setbacks, drainage rules, and safety standards.
Making Your Coastal Shower Investment Count
A coastal outdoor shower works best when it feels like a natural part of the property. Start with location, drainage, and durable materials. Add privacy, hot water, lighting, and storage according to how your household uses the yard.
An $8,000 remodel can create a refined outdoor feature without excessive complexity. The strongest return comes from thoughtful construction, low maintenance, and a design that complements the home. When every detail supports comfort and practical use, the shower serves your household well while adding appeal for future buyers.
Frequently Asked Questions
How much does a coastal outdoor shower usually cost?
A basic cold-water rinse station may cost less, while a full remodel with hot water, drainage, privacy walls, lighting, and durable finishes can approach $8,000 or more. Site access and plumbing distance strongly influence the final price.
Does an outdoor shower add resale value?
It can improve buyer appeal, especially near beaches, pools, and entertaining areas. The return depends on construction quality, neighborhood expectations, maintenance, and how well the feature matches the property.
What is the best flooring for an outdoor shower?
Textured porcelain tile, sealed concrete, natural stone with suitable traction, teak, and composite decking are common choices. The surface should resist slipping, drain well, and tolerate repeated moisture.
Should a coastal outdoor shower include hot water?
Hot water makes the shower more useful for bathing, rinsing pets, and removing sunscreen. If the shower is used only for quick beach rinses, cold water may meet your needs and reduce installation costs.
How do you protect an outdoor shower from salt air?
Choose marine-grade stainless steel fixtures, powder-coated aluminum panels, and corrosion-resistant fasteners. Rinse surfaces regularly and avoid untreated metals that corrode quickly in coastal environments.
Can plants provide enough privacy?
Tall, noninvasive screening plants can create effective privacy when combined with structural elements. Choose species that tolerate salt spray and position them to allow airflow while blocking sight lines from neighboring properties.